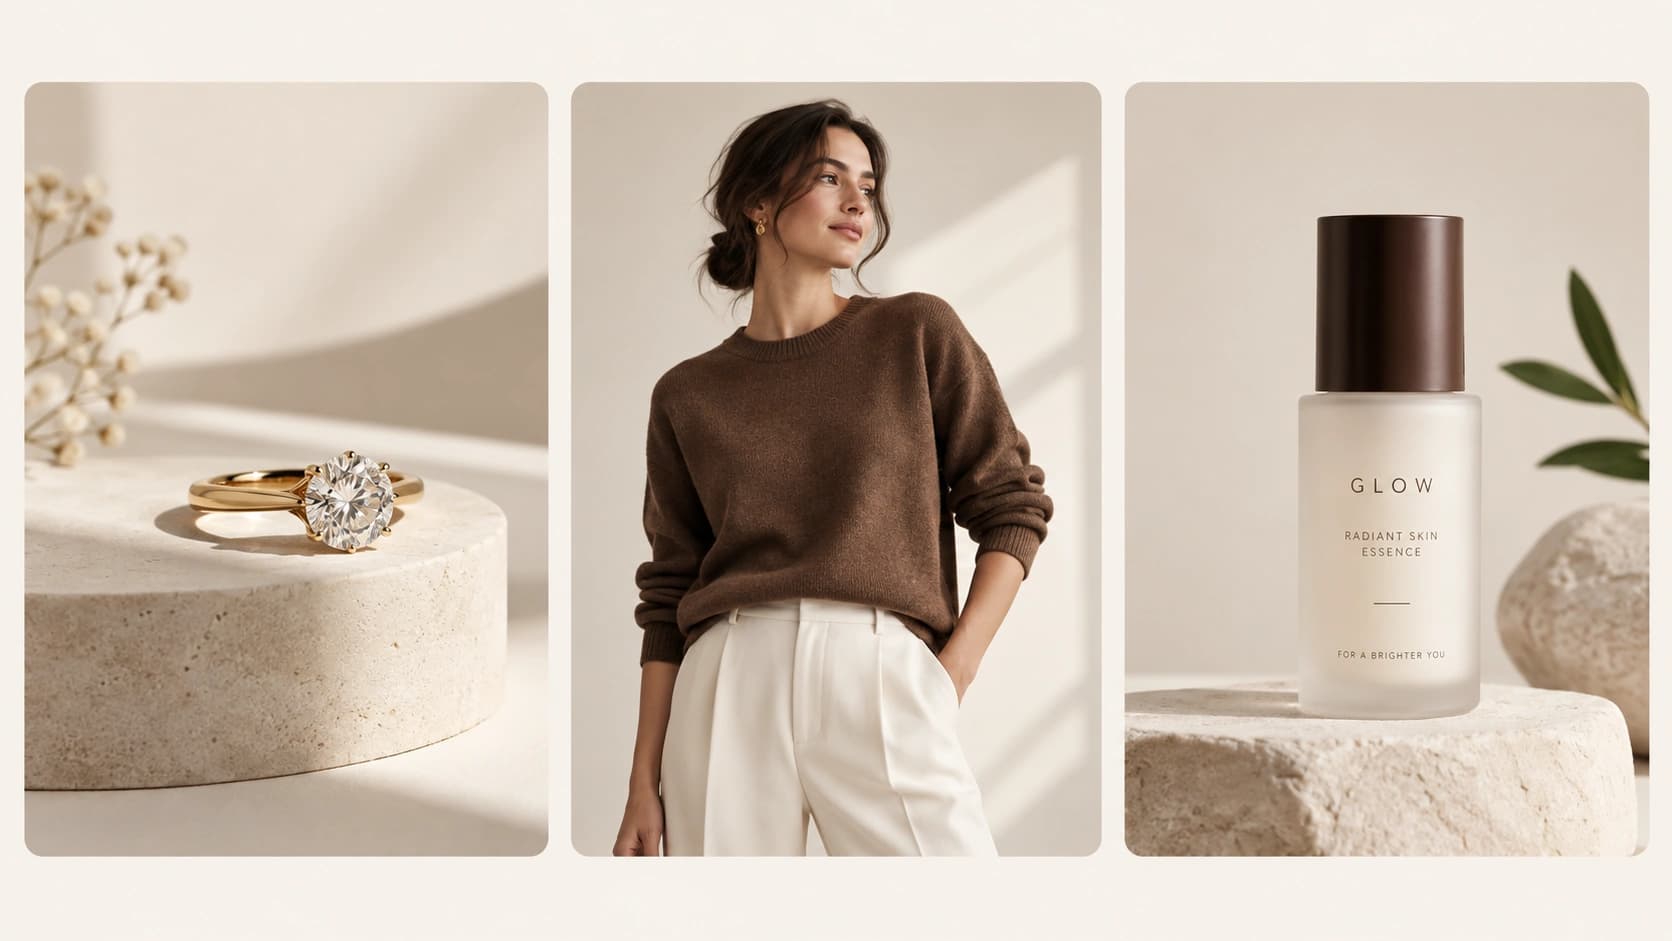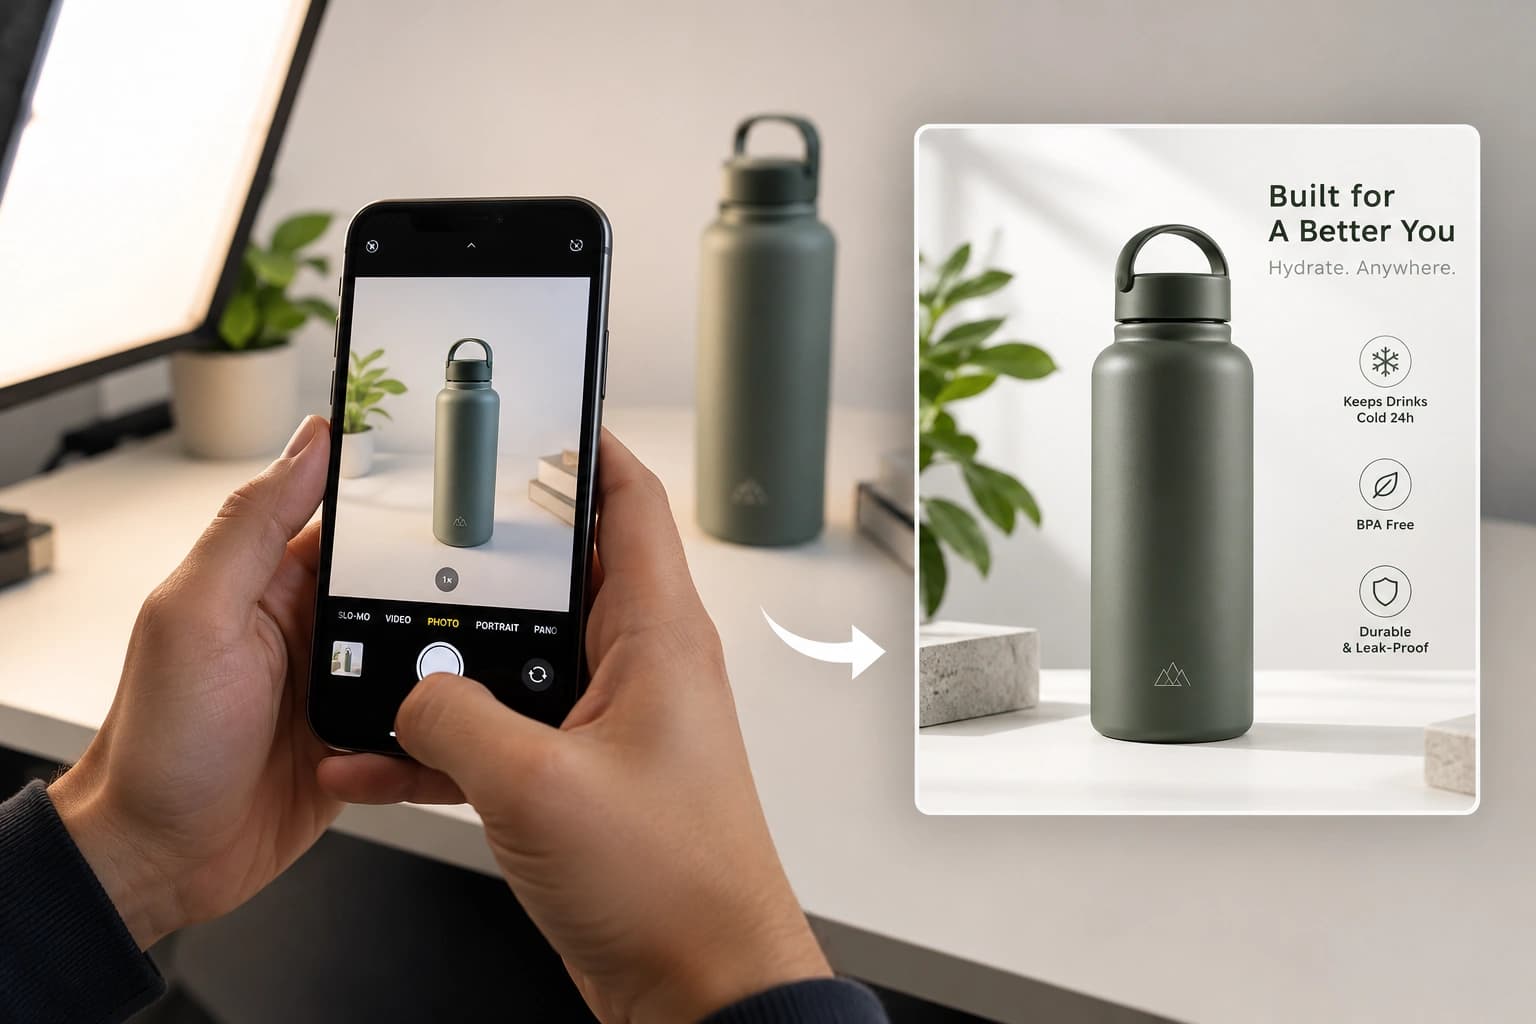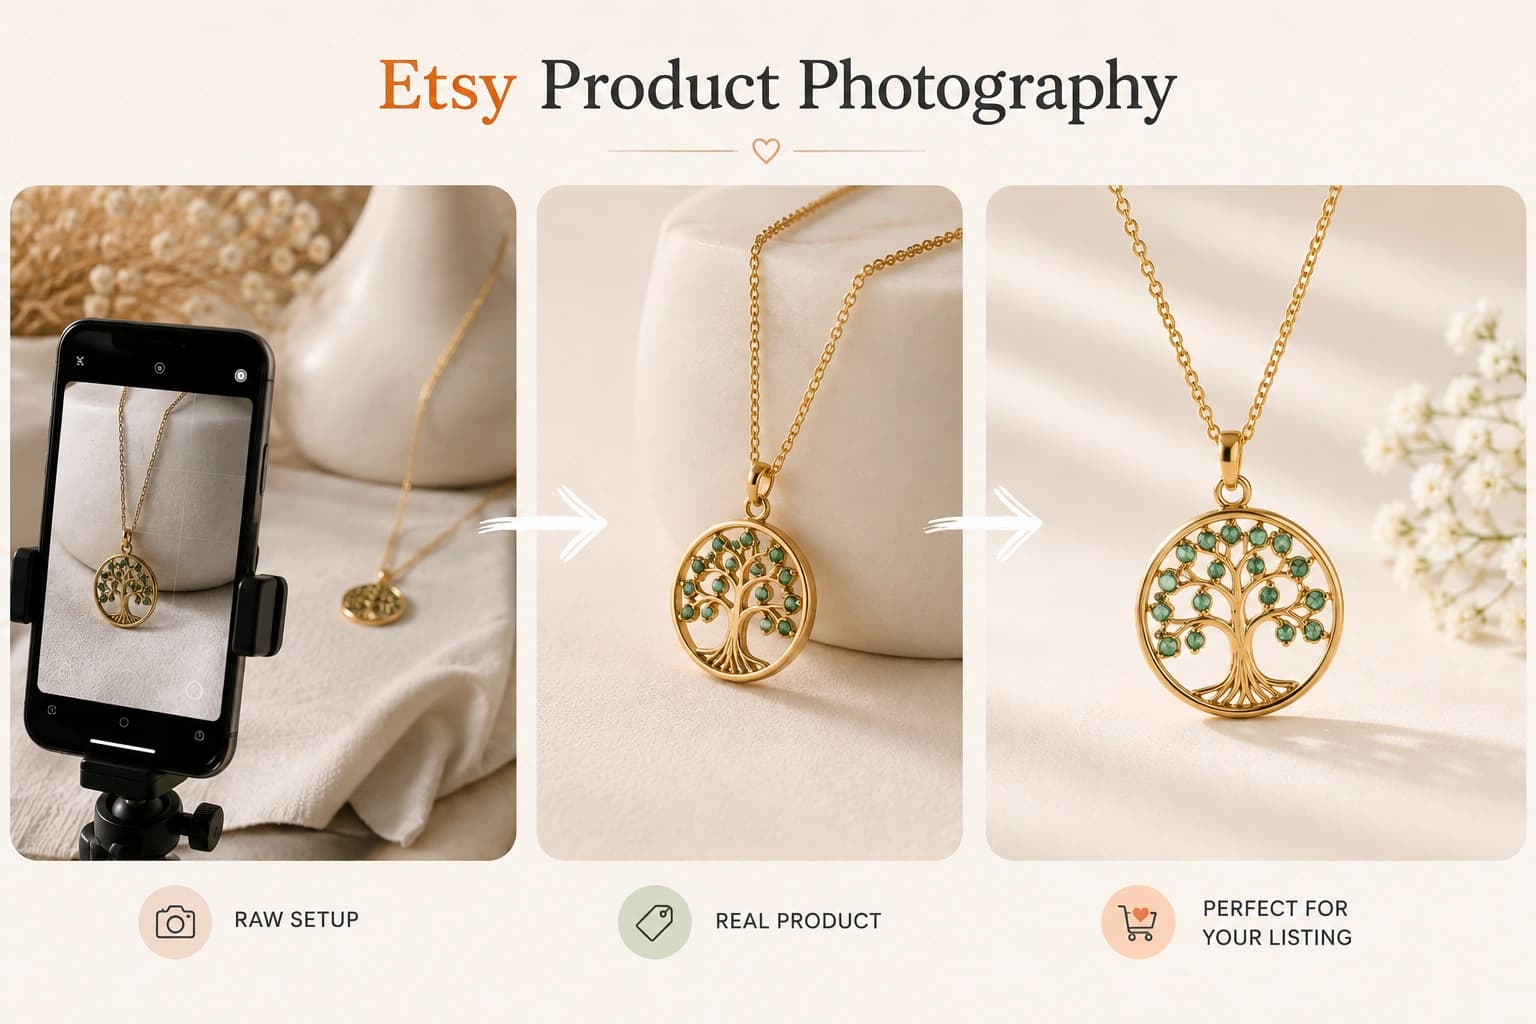
Your Etsy product can be amazing. Your pricing can be competitive. Your reviews can be excellent.
But if the product photo looks dark, cluttered, blurry, or difficult to understand, shoppers may never click the listing.
That is why Etsy product photography is more than simply taking a nice picture. Your photos need to make the product easy to notice, easy to understand, and easy to trust.
Etsy itself says product photography plays a major role in shoppers’ purchase decisions, and its Seller Handbook emphasizes that strong product images should clearly show the item, communicate details such as size and color, and help shoppers imagine the product in their lives.
The good news is that you do not need a professional studio or an expensive camera to create better Etsy listing photos.
A smartphone, good lighting, a clean background, and a repeatable photography workflow can take you a long way.
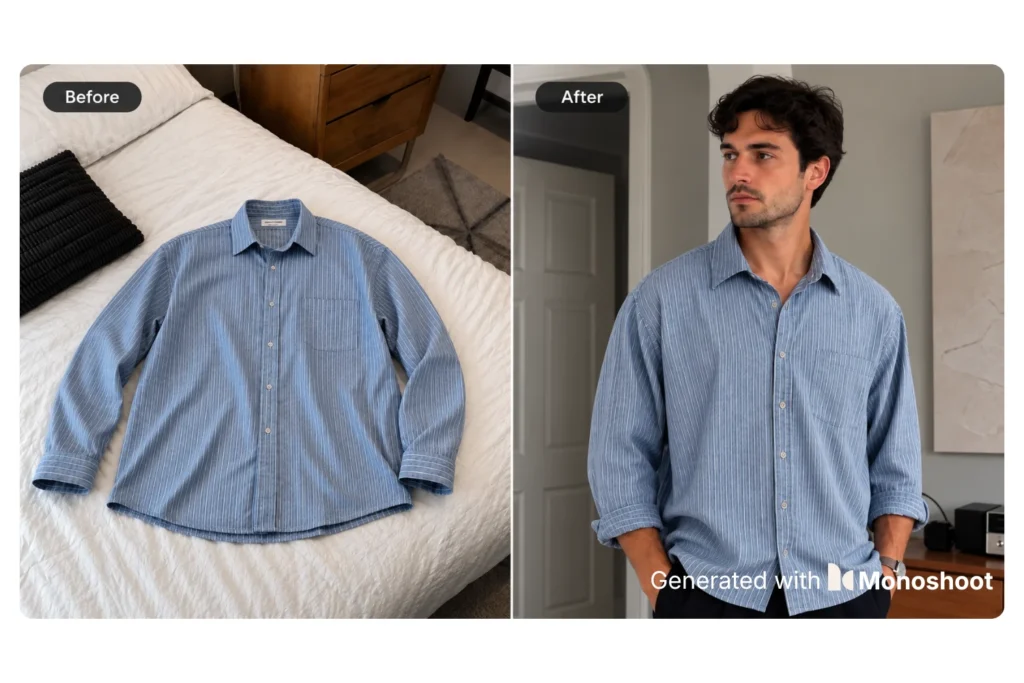
And when you already have a decent photo of the real product, AI can help you create additional studio or lifestyle visuals without arranging another full photoshoot.
In this guide, you’ll learn 9 practical Etsy product photography tips, current Etsy image requirements, what photos to include in your listing, category-specific techniques for jewelry, clothing, and beauty products, and how to use AI without losing product accuracy.
Etsy Product Photography: What You Need to Know First
Before worrying about backgrounds, props, or AI, get the fundamentals right.
Etsy currently recommends that listing images have a width and height of at least 2000 pixels. Etsy also says the first listing photo should have a width and height of at least 635 pixels to avoid appearing lower in search.
For the first image, Etsy recommends a horizontal or square orientation and advises sellers to leave enough space around the product so the image can withstand different thumbnail crops.
Etsy’s current listing workflow allows sellers to add up to 20 photos and 2 videos, with listing videos lasting 5–15 seconds.
That gives you plenty of room to show the product from different angles and answer the questions a shopper may have before buying.
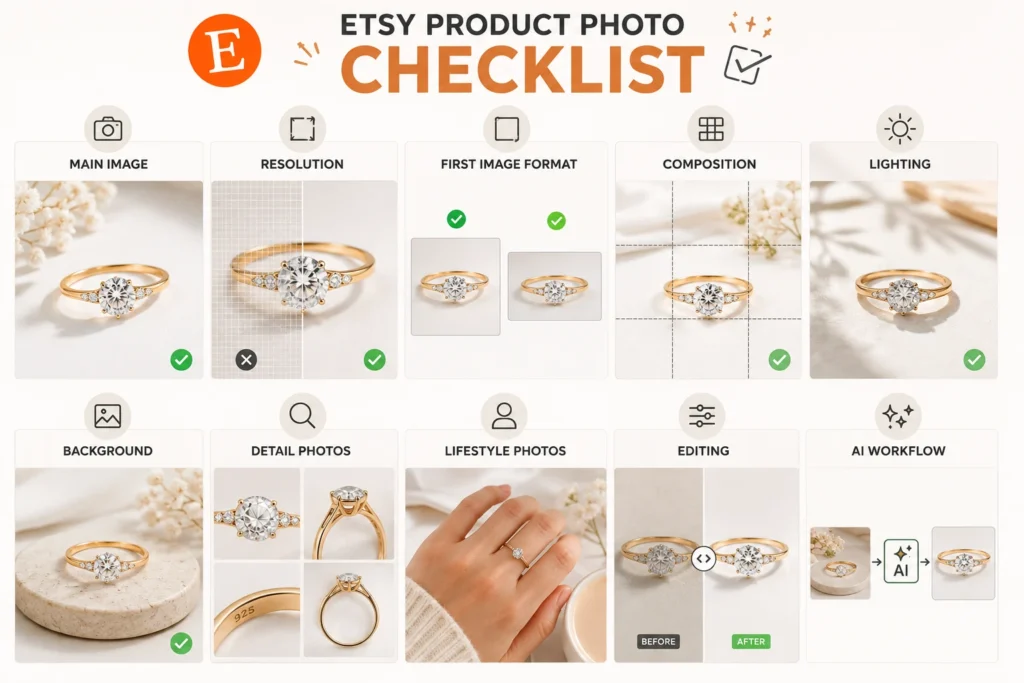
A simple Etsy product photo checklist
| Element | What to aim for |
|---|---|
| Main image | Clear, bright, instantly understandable |
| Resolution | At least 2000 × 2000 px recommended by Etsy |
| First-image format | Horizontal or square |
| Composition | Product clearly visible with enough surrounding space |
| Lighting | Soft, even, color-accurate |
| Background | Clean and relevant to the product |
| Detail photos | Show materials, texture and construction |
| Lifestyle photos | Show scale and context |
| Editing | Improve presentation without changing the product |
| AI workflow | Start from the real product whenever possible |
9 Etsy Product Photography Tips to Help You Sell More
1. Make Your First Photo Strong Enough to Stop the Scroll
Your first Etsy listing image has a difficult job.
It needs to compete with every other product around it when a shopper is quickly browsing search results.
That means your first photo should not require explanation.
A shopper should be able to look at it and immediately understand:
What is this?
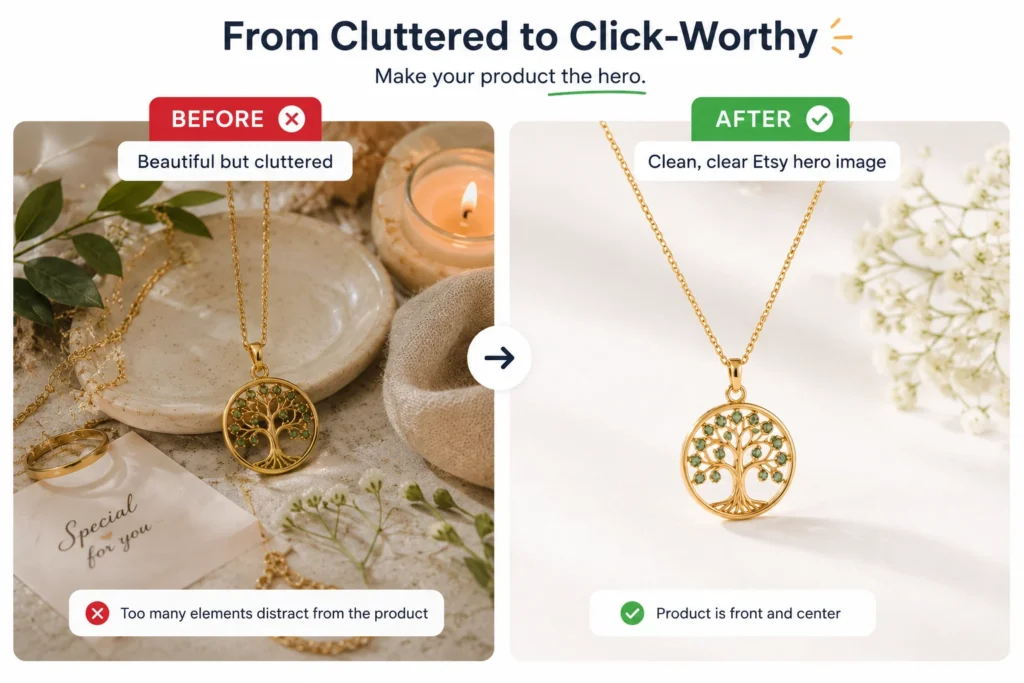
The most common mistake is making the main image too artistic.
A beautiful scene with flowers, books, fabric, candles, or other props may look impressive when viewed large, but if the product becomes small or unclear in the thumbnail, the composition is working against you.
For the primary image:
- Make the product the obvious focal point.
- Keep it large enough to understand quickly.
- Use enough contrast between the product and background.
- Remove unnecessary props.
- Avoid distracting patterns.
- Leave enough room around the product for cropping.
- Keep the most important details toward the center.
Etsy specifically recommends leaving enough border around your product because listing images can be displayed in different thumbnail crops. Its help documentation also recommends using the thumbnail adjustment tool to preview how your image will appear.
The thumbnail test
Take your main image and shrink it dramatically.
Then ask:
Can I still tell exactly what the product is?
If not, simplify it.
Your most creative photo doesn’t necessarily need to be your first photo.
Your clearest photo should be.
2. Use Soft Lighting That Shows the Real Product
You don’t need expensive studio lights to get good Etsy product photography.
A window can be enough.
Etsy’s photography guidance recommends natural light and explains that you can create product photography setups at home without professional studio equipment.
The easiest setup is:
Window → Product → White reflector
Place the product near a window where the light is soft and indirect.
If one side of the product is significantly darker, put a white card or foam board on the opposite side to bounce some light back.
Avoid harsh lighting
Direct midday sunlight can create:
- Hard shadows
- Strong hotspots
- Unwanted reflections
- Uneven exposure
- Difficult-to-control contrast
This can be particularly problematic for reflective products such as jewelry, glass packaging, bottles, and polished accessories.
Also avoid mixing several different light sources.
For example, using warm ceiling lights together with cool daylight can create strange color shifts across the same product.
The objective isn’t dramatic lighting.
It is accurate, clean, flattering light.
A beginner-friendly setup
You can start with:
- Smartphone
- Window
- White foam board
- Neutral backdrop
- Small tripod
Etsy’s current photography guidance similarly lists a smartphone/camera, table or hard surface, lighting, background and tripod among the essential equipment for a product shoot.
Photograph your products at home
3. Choose a Background That Makes the Product Stand Out
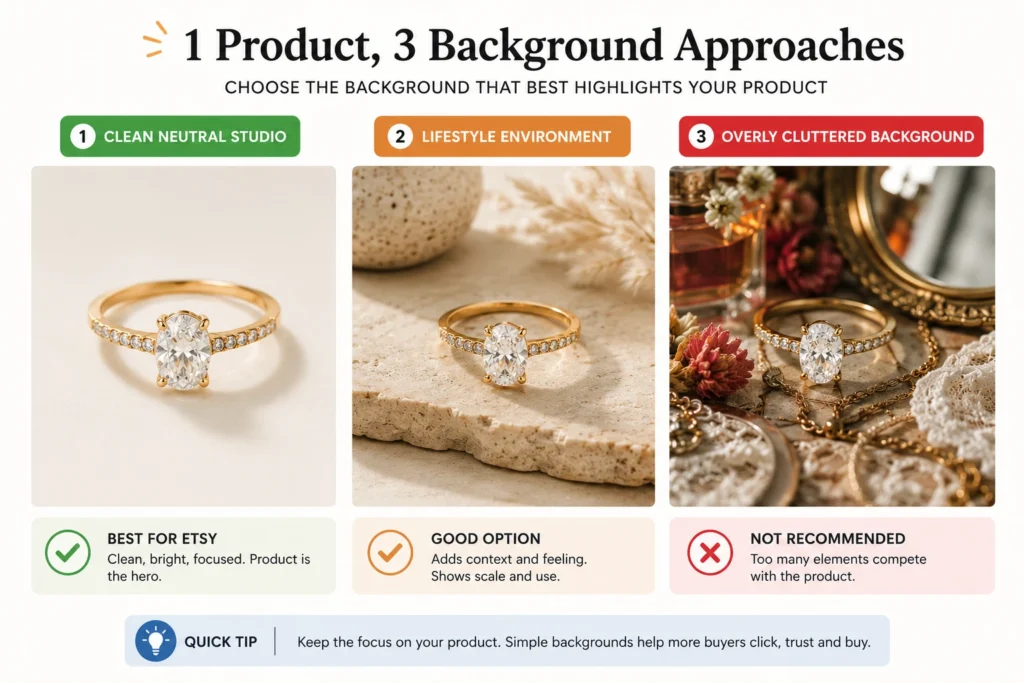
A good background should support the product.
It shouldn’t compete with it.
For your main Etsy image, neutral backgrounds are often a good starting point:
- White
- Cream
- Beige
- Light gray
- Soft stone
- Subtle natural textures
But that doesn’t mean every Etsy photo needs to look like an Amazon catalog image.
Etsy is a marketplace built around handmade, vintage, creative, and distinctive products. A lifestyle environment can add personality and help shoppers imagine how a product fits into their life.
The key is knowing which photo should do which job.
Use a clean background for clarity
Your primary photo should answer:
What am I buying?
Use a lifestyle background for emotion
A secondary photo can answer:
What will this look like in my life?
For example:
A handmade candle could have a clean product photo followed by a cozy bedroom or living-room scene.
A necklace could have a clean close-up followed by an on-model photo.
A skincare product could have a clear packaging shot followed by a bathroom or vanity scene.
This combination gives you both clarity and visual storytelling.
4. Show Different Angles Instead of Repeating the Same Photo
One photo rarely answers everything a customer needs to know.
A strong Etsy listing uses multiple images to reduce uncertainty.
Etsy’s own product photography guidance recommends using a variety of photo types because different images can communicate different information about the product, including size, color, materials, purpose and context.
For example, an Etsy jewelry listing might include:
- Main product photo
- Close-up detail
- Side angle
- Back or clasp
- On-model photo
- Scale reference
- Lifestyle image
- Packaging
A clothing listing might include:
- Front view
- Back view
- Full garment
- Fabric close-up
- Detail shot
- On-model photo
- Scale/fit reference
- Lifestyle image
The idea is simple:
Don’t fill your listing with eight versions of the same picture.
Make each image answer a different question.
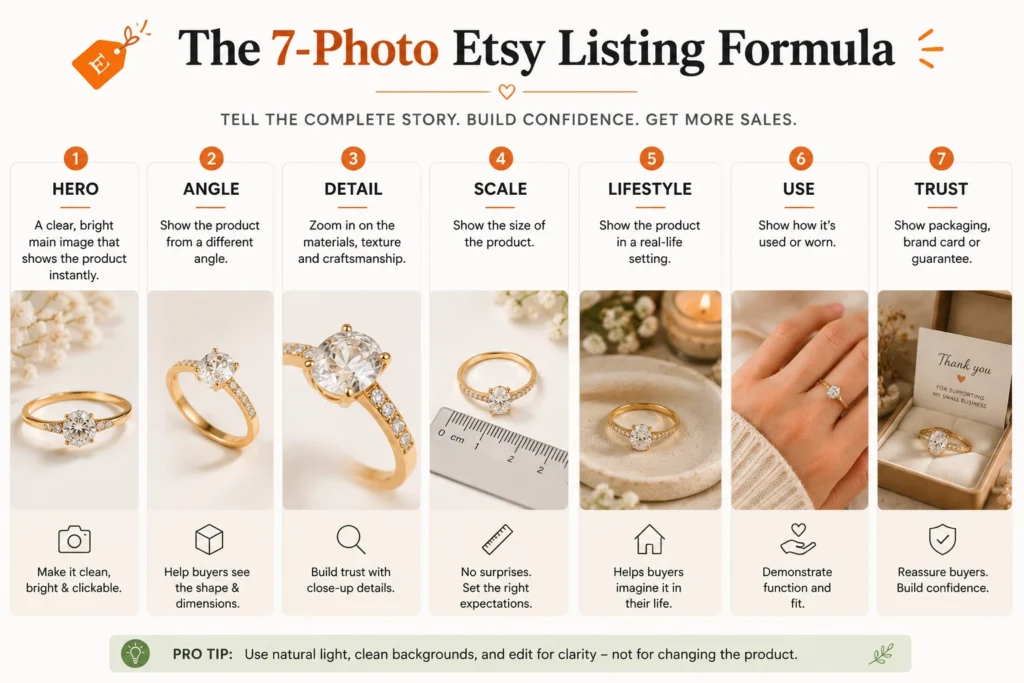
Think of your photo sequence like a sales conversation
Photo 1: What is it?
Photo 2: What does it look like from another angle?
Photo 3: What are the important details?
Photo 4: How large is it?
Photo 5: What does it look like being used or worn?
Photo 6: What does the material or construction look like?
Photo 7: What does the product feel like in context?
That is much more useful than simply adding more photos.
5. Show Scale So Buyers Know What They Are Getting
Online shoppers can’t pick up your product.
They can’t hold it.
They can’t compare it with something familiar.
Your photography needs to do some of that work for them.
A scale image can instantly communicate information that a product-only image cannot.
Examples:
Jewelry: worn on a person
Handbag: being carried
Ceramic mug: held in a hand
Wall art: displayed in a room
Skincare: shown beside a hand or on a bathroom counter
Clothing: shown on a person
Scale photography can also reduce one of the biggest uncertainties in online shopping:
“How big is this really?”
Etsy’s own guidance emphasizes that good product photography should communicate important information such as size and help shoppers imagine the product in their lives.
Don’t hide the product inside the lifestyle scene
The lifestyle image should provide context, but the product still needs to be easy to see.
A good rule is:
Lifestyle should add context, not confusion.
Scale photography is especially useful for different product categories. Jewelry sellers can learn how to photograph jewelry on a phone without a lightbox, while clothing sellers can explore ways to photograph clothes without a model. For skincare sellers, this guide to photographing skincare products at home covers how to create better product images without a studio.
6. Keep Product Colors, Labels, and Details Accurate
This is especially important if you’re using AI.
A polished photo is only useful when it still represents the real product.
Etsy’s listing image policy says sellers generally need to use their own photos of the actual finished product buyers will receive. Etsy’s policy includes limited exceptions for things such as certain personalized products and some production-partner situations.
That means you should be careful with any workflow that changes the product itself.
Pay particular attention to:
- Product color
- Shape
- Proportions
- Material
- Texture
- Labels
- Logos
- Packaging
- Stone placement
- Hardware
- Clothing details
For cosmetics and skincare especially, an AI tool that changes tiny text on a label may create a beautiful image that is still unsuitable for your listing.
For jewelry, an AI tool may accidentally alter a stone’s shape, metal finish, clasp, or proportions.
For fashion, it may modify stitching, buttons, seams, patterns, or garment construction.
The safest AI photography approach
Start with:
Your real product photo
Then use AI for:
The environment, styling, background, composition, or presentation
Rather than:
Generate an entirely new product
That’s an important distinction.
AI can produce impressive-looking scenes, but the biggest challenge is making sure the final image still matches the product you’re actually selling. Learn why AI product photography can fail product fidelity and how to fix those issues before using AI images in your Etsy listings.
Before publishing an AI-generated product image, compare it carefully with your original photo. This guide to AI product photography accuracy explains how e-commerce brands keep their products consistent and authentic across generated images.
7. Create a Consistent Look Across Your Etsy Shop
Imagine landing on two Etsy stores.
The first has:
- White background on one listing
- Dark wooden background on another
- Yellow lighting on another
- Different image ratios everywhere
- Random prop styles
- Different framing on every product
The second has:
- Consistent lighting
- Similar framing
- Repeatable backgrounds
- Similar color treatment
- Consistent photo proportions
- A recognizable visual style
The second shop immediately feels more intentional.
That doesn’t mean every photo needs to be identical.
It means the photos should feel like they belong to the same brand.
Create a simple photography system
Choose:
Background: Cream, white, beige, or another brand-aligned neutral
Lighting: Soft and consistent
Composition: Product centered or consistently positioned
Crop: Consistent ratio
Props: Minimal and category-specific
Colors: A limited visual palette
This becomes especially valuable when your shop grows.
Instead of deciding how to photograph every new product from scratch, you already have a system.
Etsy’s own current photography guidance also recommends creating images that work across multiple crops and ratios and keeping listing images cohesive.
8. Use AI to Create More Etsy Product Photos From the Photos You Already Have
This is where product photography becomes much easier to scale.
Imagine you’ve just photographed a bracelet on your phone.
You might already have a usable source photo.
But now you want:
- A premium studio image
- An on-model image
- A lifestyle image
- A seasonal image
- A different background
- A social media image
- An advertising creative
Traditionally, every new visual direction could mean another setup or another photoshoot.
AI can reduce that production burden.
A practical workflow
Instead of:
Photoshoot → Edit → New setup → Photoshoot → Edit
you can use:
Real product photo → AI-assisted scene creation → Accuracy review → Export
That’s useful for Etsy sellers because adding more products often means repeatedly recreating the same photography process.
Where AI helps most
AI product photography can be particularly useful for:
- Lifestyle scenes
- Background variations
- Studio environments
- Seasonal campaigns
- On-model presentations
- Brand-consistent visual sets
- Social content
- Ad creative variations
But the best workflow still begins with the actual product.
Create Etsy-ready product visuals with Monoshoot
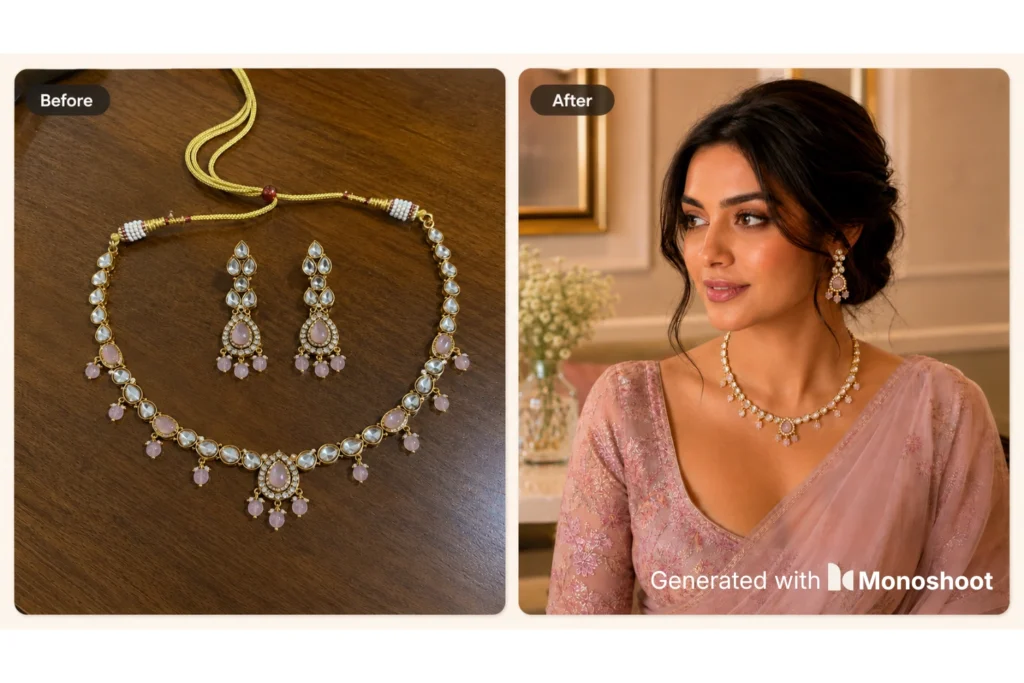
Monoshoot is built around turning a real product photo into polished product photography.
You upload your source image and use it to create professional-looking visuals for categories such as jewelry, clothing, cosmetics, and wellness.
That means you don’t need to start by asking AI to invent your product.
You start with the product you actually sell.
Turn your Etsy product photos into studio-quality visuals with Monoshoot →
9. Build Your Photo Set Around the Buyer’s Questions
Instead of asking:
“How many beautiful photos can I make?”
ask:
“What does my buyer need to know before purchasing?”
That changes your approach to Etsy product photography.
A strong listing can follow this visual sequence:
Photo 1: The Hero
The cleanest, clearest product image.
Photo 2: Another Angle
Show the product from a different perspective.
Photo 3: The Details
Show texture, material, construction, finish, label, stitching, stones, or other important details.
Photo 4: Scale
Show the product worn, held, or placed next to something familiar.
Photo 5: Lifestyle
Help the customer imagine the product in their own life.
Photo 6: Use or Function
Show how the product works or looks when used.
Photo 7: Trust
Show packaging, craftsmanship, materials, customization, or another purchase-critical detail.
You don’t need to follow that sequence mechanically for every product.
The point is to create a visual path from:
Attention → Understanding → Confidence → Purchase
Etsy’s own product photography guide follows a similar principle: different photo types communicate different information and help shoppers make informed purchases.
What Size Should Etsy Product Photos Be?
This is one of the most important technical questions.
Etsy currently recommends listing photos with a width and height of at least 2000 pixels. Etsy also says the first listing photo should have a width and height of at least 635 pixels to avoid appearing lower in search.
Etsy supports JPG, GIF, PNG, SVG, and HEIC image formats, although animated GIFs and transparent PNGs are not supported for shop images.
Etsy also recommends using the sRGB color profile if colors aren’t displaying correctly, because Etsy converts images to sRGB.
Practical recommendation
For your source photography, work with the highest-quality original image you can reasonably produce.
Then make sure the final exported image:
- Is large enough
- Is sharp
- Has accurate colors
- Has enough breathing room
- Doesn’t crop important product details
- Works at thumbnail size
Don’t upscale a tiny, blurry source image and expect the result to become genuinely detailed.
More pixels cannot recreate information that was never captured.
How Many Photos Should an Etsy Listing Have?
Etsy currently allows up to 20 photos and 2 short videos per listing.
That does not mean you should upload 20 nearly identical photographs.
Use the available space strategically.
A useful starting structure is:
1: Main product
2: Alternate angle
3: Detail
4: Scale
5: Lifestyle
6: Use/function
7: Packaging or trust
Additional images can cover variants, materials, customization options, special details, or other questions specific to your product.
The goal isn’t to maximize image count.
It’s to maximize useful information per image.
Etsy Product Photography by Category
Different products need different photography strategies.
Jewelry Product Photography for Etsy
Jewelry is highly visual and highly detail-sensitive.
Prioritize:
- Sharp close-ups
- Accurate metal color
- Stone clarity
- Clean highlights
- Detail photography
- Scale
- On-model photography
- Premium backgrounds
Jewelry usually benefits from a combination of:
Clean studio + close-up + on-model + lifestyle
The close-up communicates craftsmanship.
The model image communicates scale.
The lifestyle image communicates feeling.
How to Photograph Jewelry on Your Phone (No Lightbox)
Clothing Product Photography for Etsy
Clothing buyers need to understand more than appearance.
They need to understand:
- Shape
- Fit
- Length
- Texture
- Pattern
- Construction
- How the garment looks when worn
Use:
- Full front image
- Full back image
- Detail image
- Fabric close-up
- On-model image
- Lifestyle image
You don’t necessarily need a professional studio or live model for every product.
How to Photograph Clothes Without a Model (4 Methods That Actually Work)
Cosmetics and Skincare Product Photography for Etsy
Beauty products have an extra photography challenge:
the packaging itself often matters.
A buyer may want to inspect:
- Brand name
- Product name
- Label
- Ingredients
- Packaging
- Cap or applicator
- Product color
- Texture
- Size
Your photos should therefore be attractive without sacrificing readability.
For AI-assisted visuals, inspect labels closely before publishing.
Best AI Tools for Cosmetics Product Photography
How to Take Etsy Product Photos at Home
You don’t need an elaborate studio.
A basic setup can be:
Phone + window + tabletop + background + reflector
Your basic setup
Place your product on a clean surface.
Put it near a window with indirect light.
Use a white card opposite the window to bounce light back toward the shadow side.
Keep the phone stable.
Then shoot:
- Straight-on
- Three-quarter angle
- Side
- Close-up
- Detail
Etsy recommends planning a shot list, shooting products in batches, and gathering your equipment before the shoot.
Etsy also recommends avoiding unnecessary distractions, cleaning dust and fingerprints before close-ups, and composing your shot deliberately rather than relying on editing to fix everything afterward.
Common Etsy Product Photography Mistakes
Mistake 1: Making the product too small
A large beautiful environment is not useful if shoppers can’t easily see what they’re buying.
Mistake 2: Using harsh light
Strong direct light can create hard shadows, hotspots and difficult reflections.
Mistake 3: Using too many props
Props should support the product.
They shouldn’t become the focal point.
Mistake 4: Showing the same angle repeatedly
Every image should provide new information.
Mistake 5: Over-editing
Do not apply aggressive filters that change the actual appearance of the product.
Etsy specifically advises against filters that alter product colors.
Mistake 6: Ignoring thumbnail cropping
Your image may look perfect full-size but fail as a thumbnail.
Etsy provides a thumbnail adjustment tool specifically so sellers can preview how the image will appear in different contexts.
Mistake 7: Using AI that changes the product
A better background is helpful.
A different product is not.
Etsy requires original photos of the actual product in most situations, so AI-generated scenes should not undermine accurate representation of what buyers will receive.
Mistake 8: Inconsistent shop photography
Your listings should feel like they belong to the same store.
Mistake 9: Shooting everything from one distance
Use a mix of wider product views and detail shots.
Can You Use AI for Etsy Product Photography?
AI can be useful for Etsy sellers, but the workflow matters.
The strongest use case is not:
“AI, invent my product.”
It’s:
“Here is my real product. Help me present it better.”
That distinction is important because Etsy’s image policy centers on accurately representing the actual item buyers will receive.
Good AI use cases
AI can help create:
- New backgrounds
- Studio environments
- Lifestyle scenes
- Seasonal visuals
- On-model compositions
- Brand-consistent imagery
- Additional marketing creatives
What you should always check
Before publishing, compare the final image against the original product.
Look at:
- Shape
- Color
- Proportion
- Texture
- Logos
- Labels
- Packaging
- Details
- Hardware
- Stones
- Clothing construction
AI should make the presentation better without making the product misleading.
Best AI Photo Tools for Etsy Sellers
A Repeatable Etsy Product Photography Workflow
Here’s a simple system you can reuse for every new product.
Step 1: Prepare the Product
Clean fingerprints, dust, lint and other distractions.
Step 2: Capture the Real Product
Use your phone or camera in good lighting.
Step 3: Create Your Main Product Photo
Keep it clear and easy to understand at thumbnail size.
Step 4: Capture Details
Photograph the features a buyer can’t understand from the main image.
Step 5: Capture Scale
Show the product worn, held, or placed in context.
Step 6: Add Lifestyle
Help the customer visualize using the product.
Step 7: Create Additional Visuals With AI
Use a product-focused AI workflow to build additional scenes from your real source photo.
Step 8: Check Accuracy
Compare every AI result with the original product.
Step 9: Check Technical Quality
Make sure the images meet Etsy’s current size and format recommendations.
Step 10: Check the Listing as a Buyer
Look at your listing on a small screen.
Ask:
Would I understand this product without contacting the seller?
If not, add or improve the image that answers the missing question.
Final Etsy Product Photography Checklist
Before publishing your next Etsy listing, run through this checklist:
- Is the product instantly recognizable in the first image?
- Is the main image clear at thumbnail size?
- Is the first image horizontal or square?
- Is there enough space around the product for Etsy’s cropping?
- Is the image at least 2000 pixels in width and height?
- Is the lighting soft and even?
- Is the product color accurate?
- Is the background clean?
- Do additional photos show different angles?
- Did you include important details?
- Did you show scale?
- Did you include a lifestyle image where useful?
- Are labels and logos accurate?
- Does the visual style match your other listings?
- Have you avoided heavy filters?
- Have you checked every AI-generated image against the original?
- Does every image provide useful information?
- Would a buyer understand the product without contacting you?
Good Etsy product photography isn’t about making every image look like a magazine cover.
It’s about making the product clear, desirable, believable, and easy to understand.
And you don’t always need another photoshoot to get there.
Start with the product photo you already have, improve the presentation, create the visual variations your listing actually needs, and keep the product itself accurate.
Turn Your Etsy Product Photos Into Studio-Quality Visuals
Already have a product photo sitting on your phone?
Use it as the starting point.
Create polished, studio-quality product visuals with Monoshoot →